Ansible as a Configuration Management Tool


Configuration Management has evolved over the years and has been a revelation for solving critical problems in the tech industry that have allowed organisations to have lots of servers in their thousands. As DevOps Engineers, we are required to perform certain functions like installation, updates, upgrades, patches, security fixes and provisioning servers. These servers could be web servers, NFS servers or database servers and when provisioned, these servers are required to be managed properly. There are various configuration tools in the market like Ansible, puppet, salt and Chef but Ansible stands out of all of them because of the major functions and tasks carried out by the tool.
Advantages of Ansible as a configuration tool.
1) Easy and free to use and it's Python based which makes it the preferred choice to most DevOps Engineers
2) Ansible is Agentless and once installed on the control server, it controls other targeted servers to communicate with them through SSH
3) Ansible is pushed-based and once pushed it can be automatically installed on all servers at once if they are all in the inventory.
4) Ansible uses YAML file which is easy to learn and can be installed in Ubuntu and Linux repos and readily available to be installed.
In this project, we would make most of the routine tasks automated by installing and configuring an Ansible client to act as a Control server and creating a playbook to automate server configuration. Ansible client would be acting as the Bastion Host as an intermediary through which access to the internal network can be provided.
We would also create a simple Ansible playbook to automate server configuration
The pre-requisite for the projects is the following.
1) Fundamental Knowledge of Installing and downloading software
2) Basic Understanding of Linux Commands
3) AWS account login with EC2 instances
4) 3 Ubuntu Webservers
5) Database Server: On Ubuntu 22.04+ MySQL
6) Storage Server: Red Hat Enterprise Linux 9 +NFS Server
7) Load Balancer Server
8) Ansible and Jenkins Server
9) Python Language
IMPLEMENTATION STEPS:
Set up all EC-2 instances and ensure you log in with your details to your AWS console via aws.amazon.com.
Click on the EC2 link, spin up 7 EC2 instances and make sure they are set up with the operating systems below.
NFS server (Red hat),3 Webservers, Ansible-Jenkins, Load Balancer and Database Server
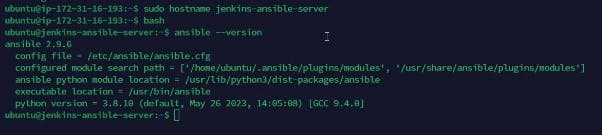
You can see the instance state that shows all servers are currently running. We would be updating our Jenkins server and naming it Jenkins-Ansible-Server for clarity as we want to use this to run our playbooks.

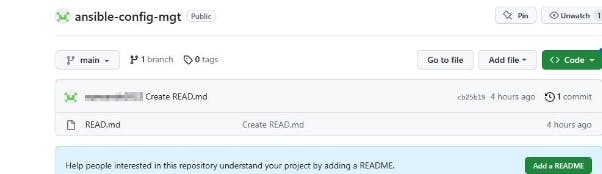
We would navigate to GitHub to create a new repository called ansible-config-mgt.
Install Ansible and check its version.
JENKINS CONFIGURATION
Now we have to configure Jenkins job to save our repository every time we make changes. Please note that our Jenkins server was configured to use an elastic IP to be able to maintain a dedicated server.
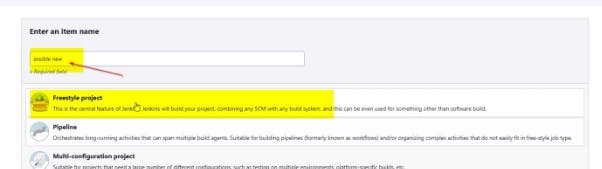
1) Access our Jenkins and create a new project “ansible new” as shown below
Fill in the description of your project and select git.

Copy and paste the git repo and ensure it is on the main branch.
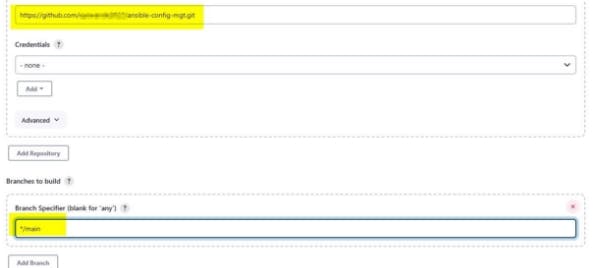
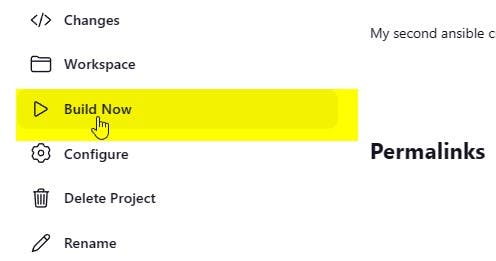
Click the build now manually to test it
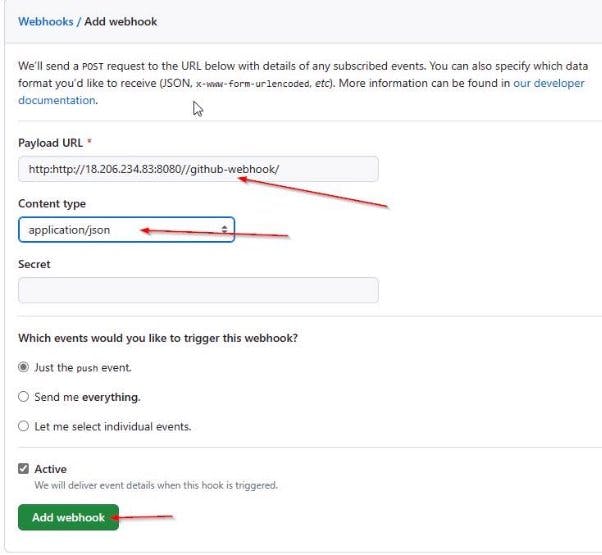
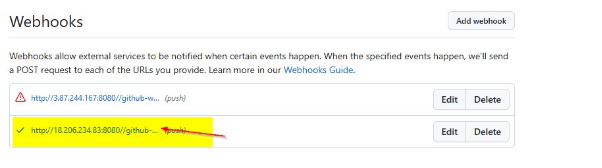
Proceed to configure and set webhook to trigger ansible build .
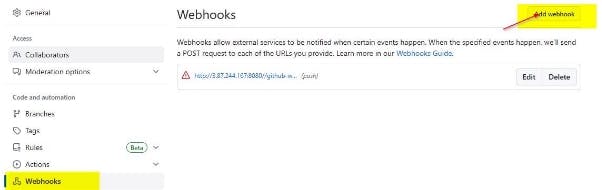
Insert the Payload URL and the content type and add the webhook.
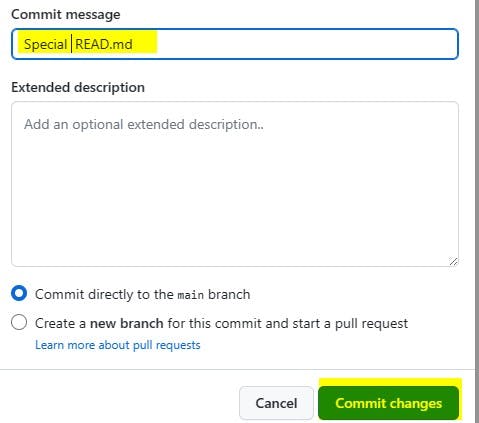
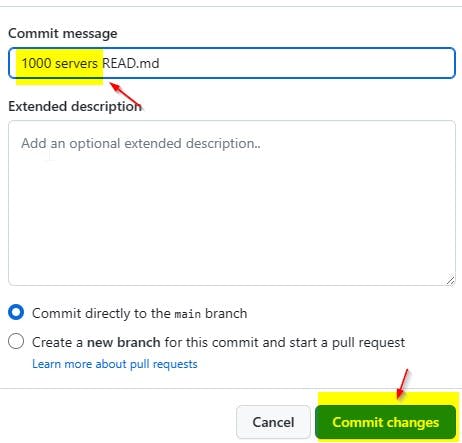
Once added, we proceed to commit new changes.

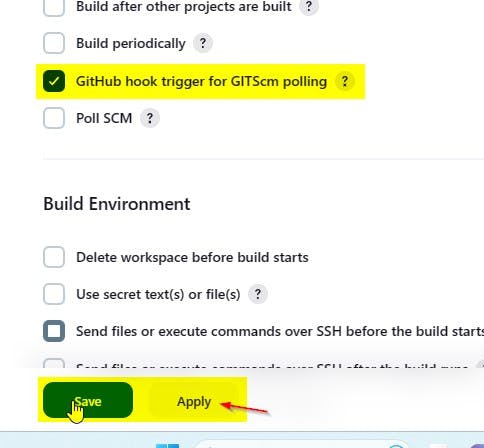
Navigate back to Jenkins to select the “GitHub hook trigger for GITScm polling.
Then Apply and Save
Click on post-build actions and archive the artefacts by adding a ** and click
Apply and Save

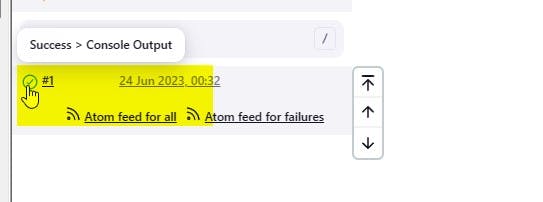
Once all task is completed, we then proceed to commit more changes but this time it would automatically populate in the Jenkins server.

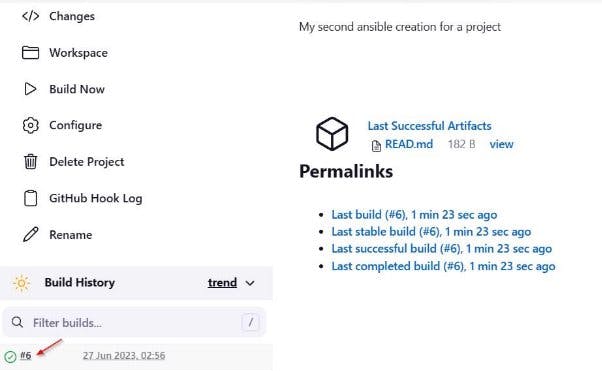
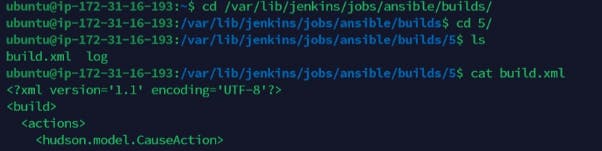
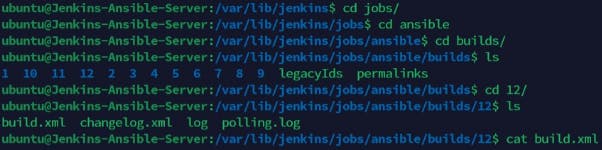
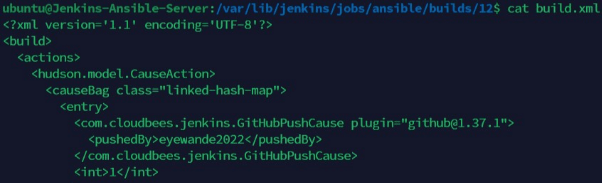
Navigate to the terminal and check any of the archived builds using the commands below
Please note: Anytime you try to stop and start your Jenkins-Ansible server. The IP address change. An elastic IP address is used to ensure the ip is still available when the instance is turned and has a static IP
Prepare your environment using Visual Studio Code
We need the Visual Studio Code to write some codes. We would first clone down our ansible-config repository to our Jenkin instance. You check the content of the Ansible server to confirm it is there as shown below.

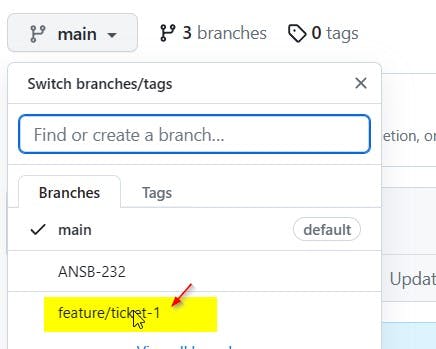
Navigate to the main branch and create a new branch called Feature/ticket-1

Connect via SSH the Jenkins-Ansible-Server


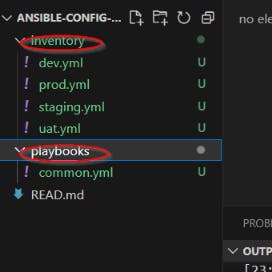
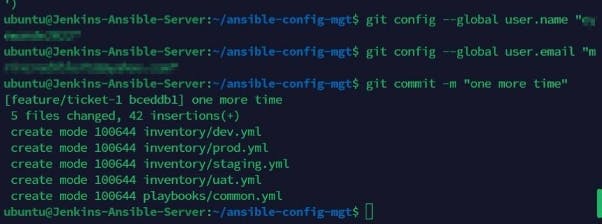
Create the folders and .yml files directly as shown below.
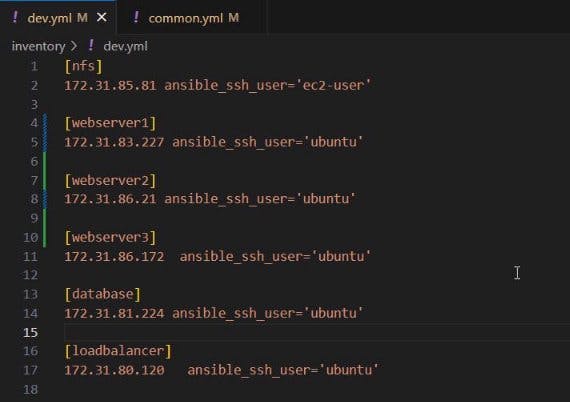
Inventory folder: contains dev.yml prod.yml staging.yml uat.yml files
Playbook folder: contains common.yml file
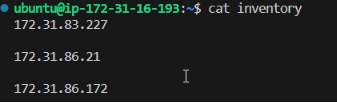
Set up an ansible inventory where all the host private IP addresses are kept and executed all at once. The 3 webservers' private IPs are kept in this inventory as shown below.
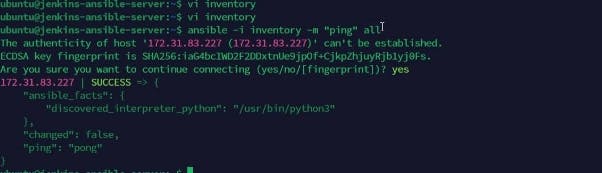
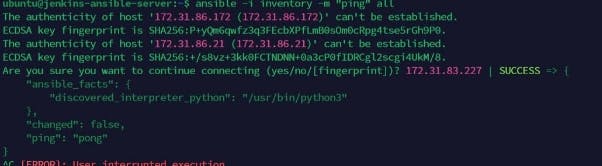
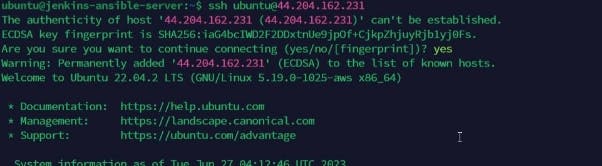
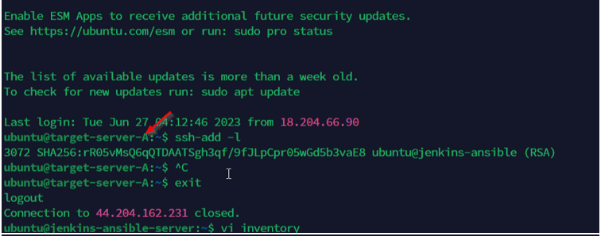
Ansible uses port: 22 as its default and it needs to SSH target servers from the Jenkins- Ansible server using the SSH-AGENT concept. We navigate into the Jenkins-Ansible server using the Termius terminal and try to perform the ansible operation to ping the target-server-A using the command below.
Or Using the SSH to successfully as seen below with the command
"ssh ubuntu@ipaddress"

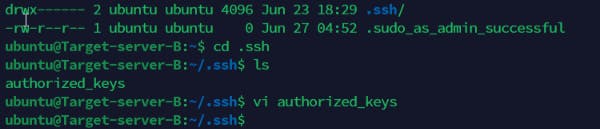
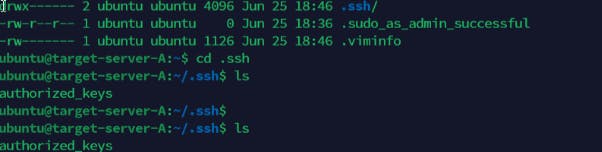
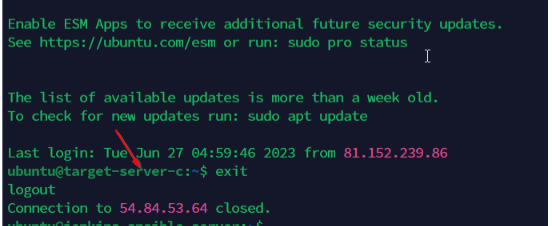
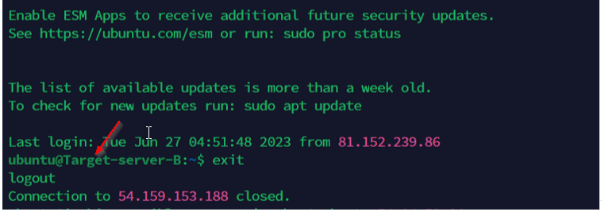
Please note that we have also connected to the target 3 servers to ensure the public key file of the Jenkins- Ansible server is added in the authorized keys file .ssh/ file as shown below
Firstly, we retrieve the public key from the Jenkins-Ansible server as shown below. Add them into each server as seen below


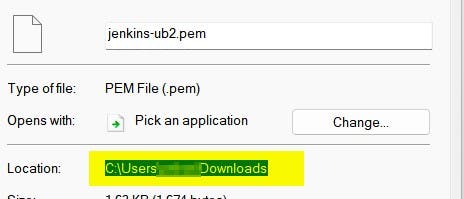
Create the agent ID and confirm the path where the .pem file key is located. Perform the ssh-add operation and confirm the identity is added and listed.

We can see that the Jenkins-Ansible Server has SSH into the target servers.
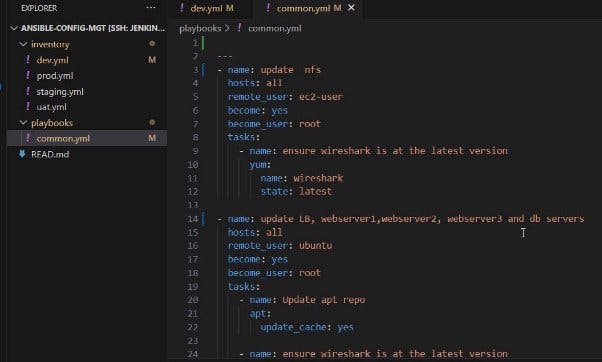
Update the Inventory/dev.yml file and take note that we have 1 ec-2 user and 5 ubuntu servers
Change the directory to the playbooks folder and update the common.yml file as shown below. It can be seen that all servers should be executed from the playbooks
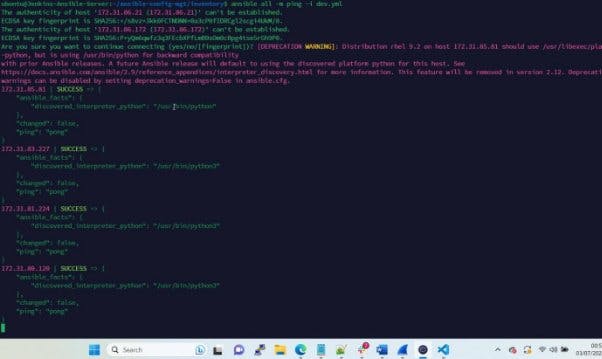
Run some shell script commands by using the Ansible command to ping the dev.yml file as shown below and success depicts all is working as expected.
ansible all -m ping -i dev.yml
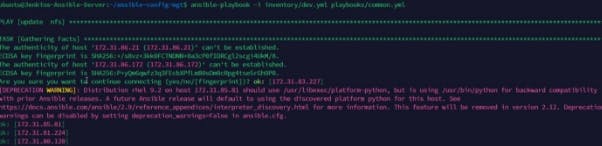
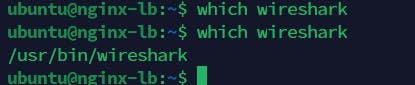
With the Ansible-playbook command, Install the wireshark from the Jenkins-Ansible server to all other target servers and confirm that each servers received those changes.
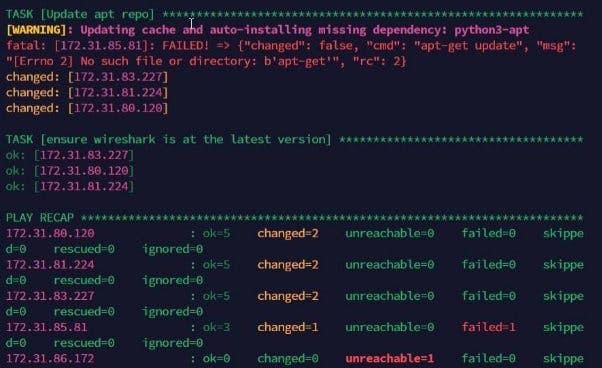
Check each server to be sure wireshark is installed on them as shown below


Now that we confirmed this, we will be pushing our commit into the github and creating a PR and expect Jenkins server to be triggered automatically and builds and artefacts generated.
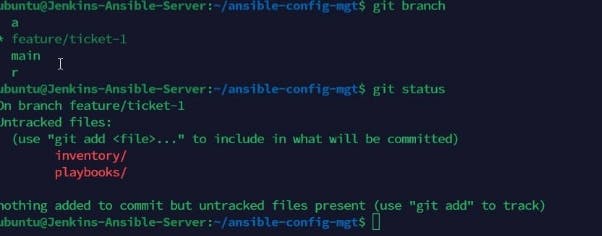
Use the "git branch" to know the branch we are one and "git status " to check the status of the untracked files we have. They are shown below
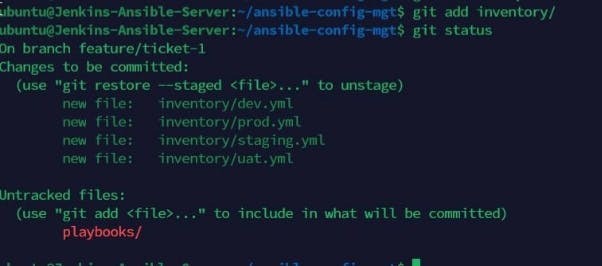
Use "git add inventory" and check to status to confirm the new files have been added.
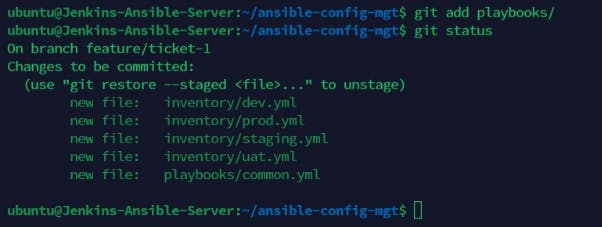
Add playbooks as they still shows untracked files
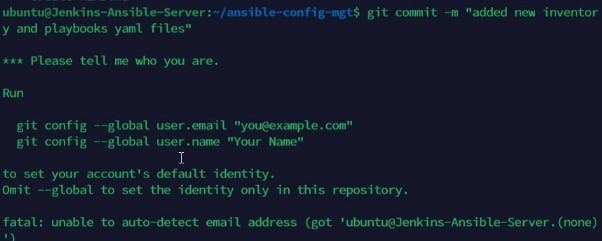
Run the git commit with a message tag and set out the git account to be accepted on the terminal. This would require the use of a classic token from git as a password would not be allowed
Set up the Url origin and check the remote.

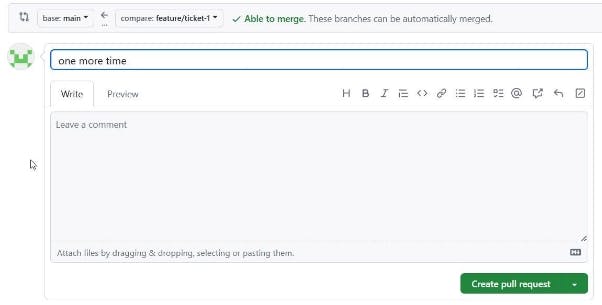
Navigate to GitHub. Create and merge the PR to the main.
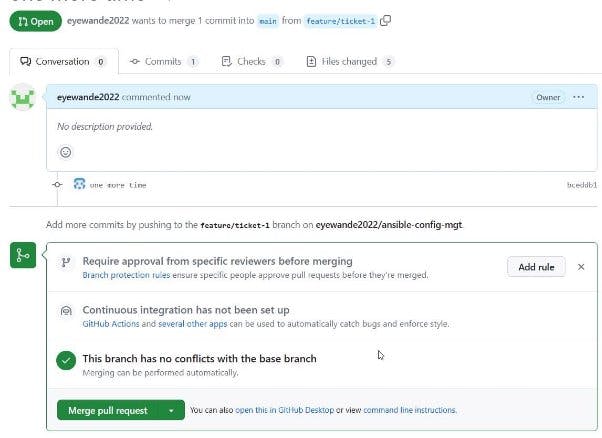
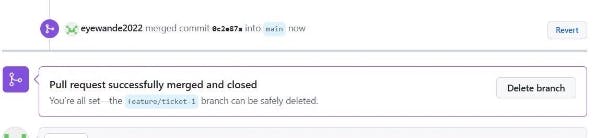

PR successfully merged and the Jenkins build would be automatically triggered as shown below. 2 jobs were created

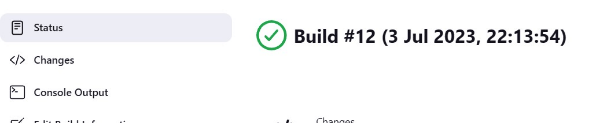
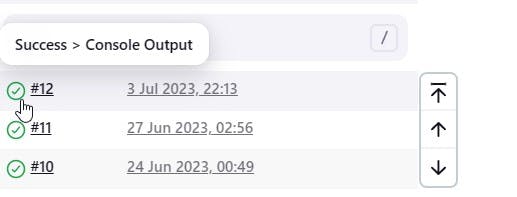
Check the server and view where the build is located
Congratulations!!!! You have just automated your routine tasks by implementing an Ansible project